NEW August 2007
Gluing Timber Parts Together
Go to Main Menu
Return to Techniques Index
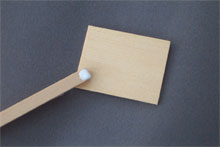
| The simplest method of applying glue is to use a spreader. A length of 3/16" x
1/16" (4.5 x 1.5 mm) or similar timber is ideal. Dip the spreader tip into the glue and
scape off excess on the container lip. Spread the glue over only one face of the parts
being assembled. For a large area, several "dips" into the glue bottle may be required. To prevent accidental disturbance to parts while the glue sets, only assemble two or three parts at a time, allowing the glue to harden before proceeding. |
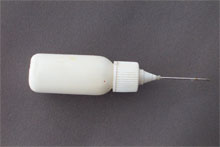
| When gluing the edge of a part, side to back or base for example, a thin bead of glue is
required. This is easily achieved by using the "babies bottle" container. For a wide edge this bead of glue can then be spread with the tip of the bottle (but not squeezing it) using a zig-zag movement. |
|
| 1) Do not use too much glue. When parts are fitted together glue should not ooze out from the joint. | |
| 2) Do not allow glue onto faces that are to be stained later. Glue inhibits the absorption of stain and will leave a colourless spot on the finished item. | |
| 3) Use a gluing table to keep the structure square (see "home made tools" in the tools section) | |
| 4) Use clamps to hold parts together while glue hardens. (see "hold parts during assembly" in the tools section) |
Go to top of Page
© 2007 Neil Helsby